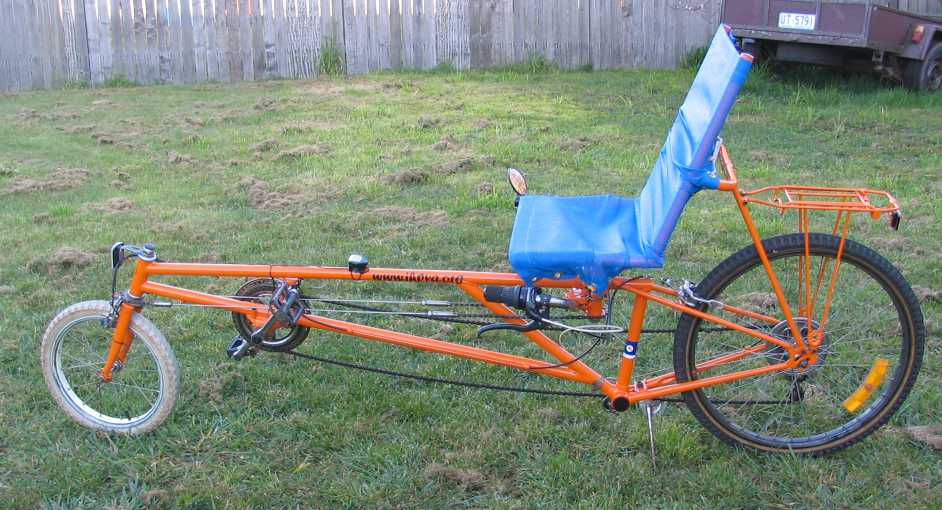
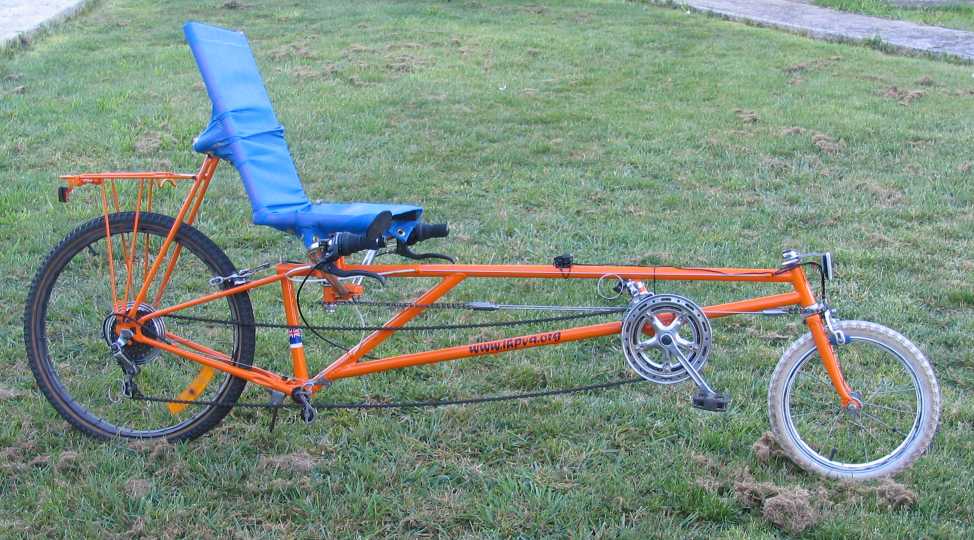
This bicycle is designed on very similar lines to the design by Richard Hoad from the Tasmania Recumbent Enthusiast Group and incorporates many old bike parts I had around the place. In all I think I used something like 12 different bikes but as you could imagine only a tube or 2 was taken from many.
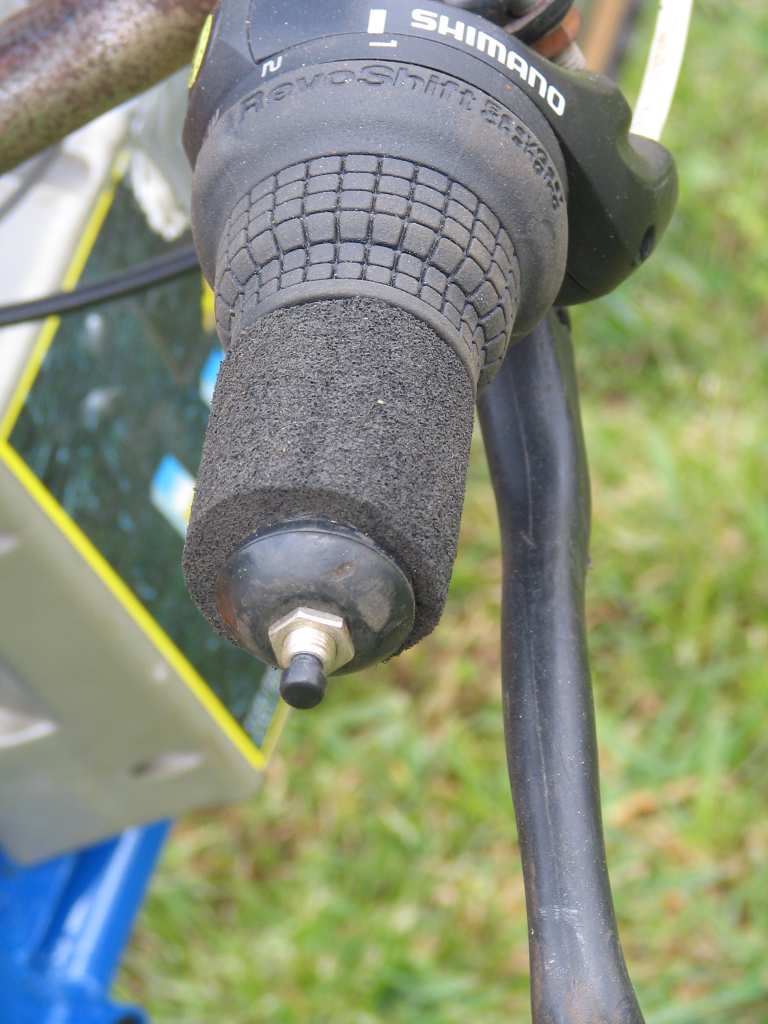
I always find building handlebars a problem as I can't bend tubing but ended up finding an exercise bike with handlebars almost exactly the shape I needed. Instead of having a bend at the end where the rider holds, a tube could be simply welded onto the end of the tube coming from the steering neck. This tube could also protrude behind allowing a handbrake to mount easy and leaving more room for the shifters etc. Handlebars are 375mm wide and the arm is 180mm long. Steering is a closed loop using bike chain and stainless wire/rod. A sprocket is welded on the handlebar steering end for the steering chain to pass over. The front has a neoprene ring cut with a holesaw the chain wraps around with the chain fixed by a bolt screwed to a thread tapped into the fork front. The size of the sprocket and/or neoprene guide determines the gearing of the steering making it more or less sensitive. EG a larger sprocket on the steering end means the handlebars turn less in relation to the front forks. This sprocket can't be too large or the steering rods will foul the drive chain and/or front cog. I originally had a cog on the front but found the rake oif the forks made it difficult to position the chain so there was no possibly it would fall off. A cog on the top of the fork tube made the angle at the handlebar end wrong. A cog placed where the neoprene ring is now made the steering end correct but also didn't work as the chain would derail. (and this is not something you want with steering)
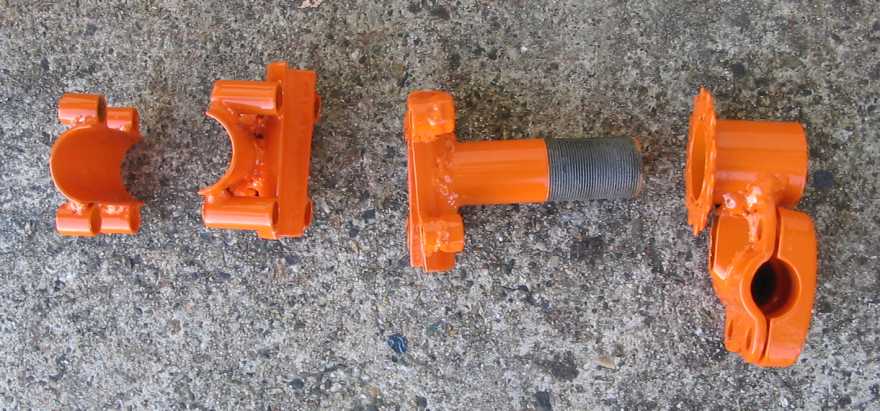
The handlebar pivot is made using an old front fork 75mm long but mounted the opposite way round. EG the threaded fork tube is fixed and the outer tube rotates. The handlebars could simply be welded onto this outer tube but I opted to weld a handlebar clamp so the handlebars could be adjusted. As the seat mount and handlebar mount is all in one this allows the handlebars to move forward/backward if the seat is adjusted remaining in it's correct place. This mount took some time to fabricate as it has quite a few parts to it but also allows the seat to pivot and be removed. See a video of the steering in motion. (2.3 meg)
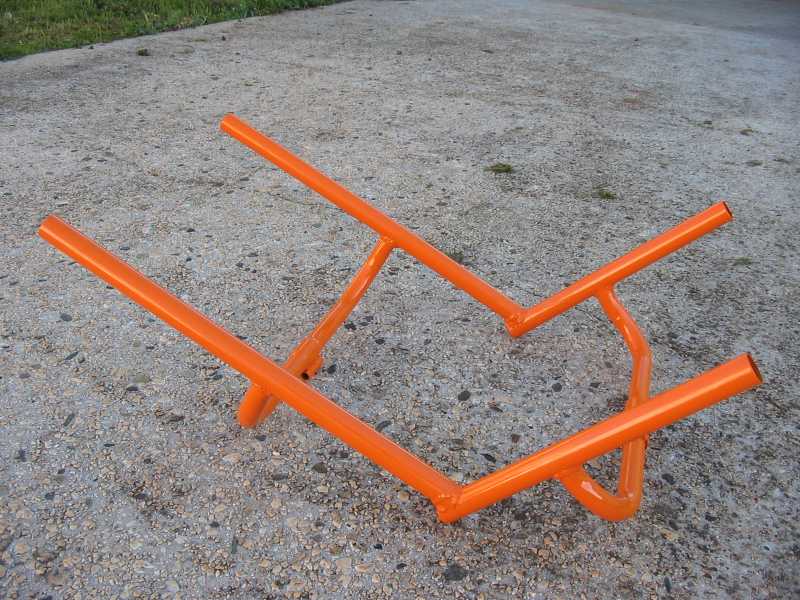
The seat tubing is taken from several bike frames - on many older bikes the tube coming from the bottom bracket to seat clamp is a little larger than the tube running from the seat riser tube to the front forks. I used the smaller of the 2. EG the vertical seat tube is the maximum length I could cut off a 27" bike and is simply welded to the horizontal tube. I was concerned the open end of the horizontal tube would crush and the seat collapse over time so a washer was welded to the end of the horizontal tube. To get curved bracing (tubing that holds the seat tubes apart) I used the old 27" racing bike handlebars cutting off the end section. It appeared to be the correct width and size but because of my size I would like just a little more width on the base so my thigh doesn't rub on the tubing. (most commercial recumbent seats are no wider than this and many even closer together so this is only my preference) This does not need to be curved tubing though as a simple V tubing arrangement could be used. In fact, I am not finding it easy to get the tension on the lower portion of the seat (as the covering has to slip over this tubing) and V bracing may help in this regard.
The seat base angle in relation to the pedals is something I didn't look into closely but had some difficulty - because I have such a low BB my thigh can easily rub on the front of the seat material and the front of the seat tubing so the base needs to be angled (down) to cater for this.
Seat material is Nylex Breezeway purchased from Greenspeed along with elastic cord to hold it on Its immensely strong and cheap to buy. I sewed the seat myself in a 7 hour operation using dental floss and a big needle. Brass eyelets are positioned every 50mm for the elastic cord to pass through.
| base | 315mm |
| back | 460mm |
| width | 378mm |
| angle base to back | 115 degrees |
I wanted to make this adjustable so this was made into a clamp 125mm long and also have the pedal placement as low as possible in relation to the seat. The front derailuer post is the minimum length (90mm) I could get away with for normal front gears and is capped off to stop moisture getting down the tubing.
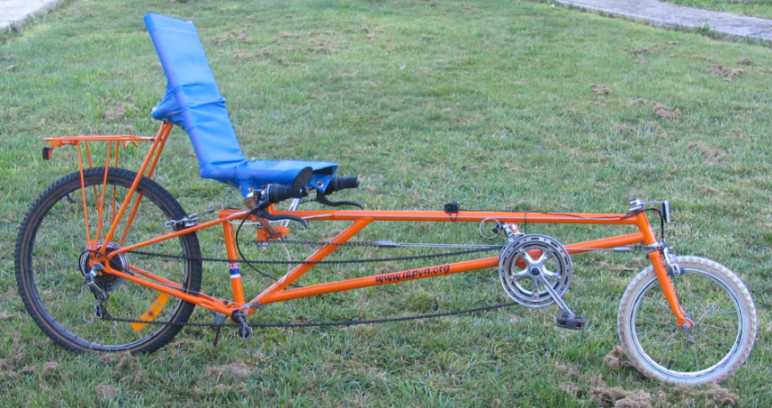
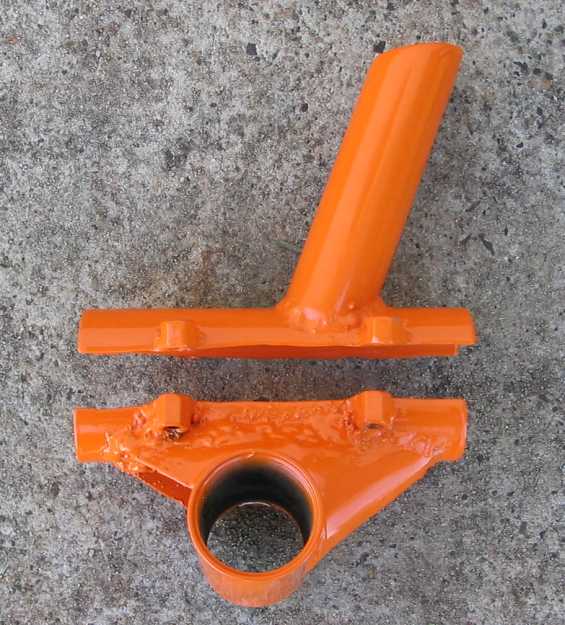
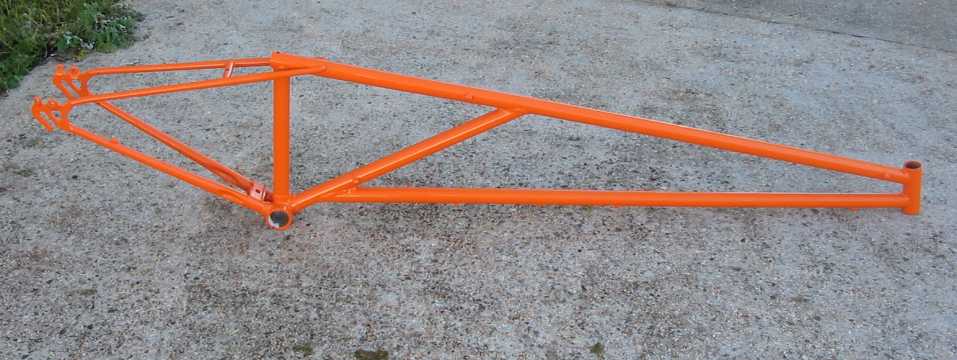
The main frame is made up of several bikes, the larger diameter tubing on 27" racing bikes. The biggest section used is the rear triangle of a 27" racing bike including the majority of the tube going from the BB to the steering head. The vertical seat tube is cut shorter and the smaller rear tubes coming from the dropout are bent down and welded to the frame. You may be able to see in the picture the different bikes used looking at the colors. The front purple section of 2 tubes and the steering head was from 1 bike.
Where a butt joint is necessary a tube that fits tightly into the frame tube is added. ( Ex bike seat tubing as this larger tube is the one on many bike the seat tube passes through) I use a MIG for almost all the welds but cannot afford gas so the gasless wiring makes less of a neat joint. Where tube meets another tube I use an excellent free tube mitering program by Giles Puckett to grind the shape.
There is no perceivable frame flex when I sit on the bike but my guess is there would have to be at least a little due to the frame length. Because of the under seat steering it took maybe 5 minutes to get used to riding the bike. I find that pretty well all people, even though they are told before-hand don't link the steering to balance when they first ride so need someone holding the bike to give them balance. They usually pedal away with no steering input and have to be coaxed to steer to balance till they get the hang of it. About 5 people have ridden this bike and most take the 5 minutes to ride unassisted. One older guy, a regular bike rider couldn't get the handle of it at all but my guess is he was so nervous about falling off he didn't concentrate on what was needed. Have a look at video riding no power assistance (1.1meg) and other with the motor on.(1.9meg)
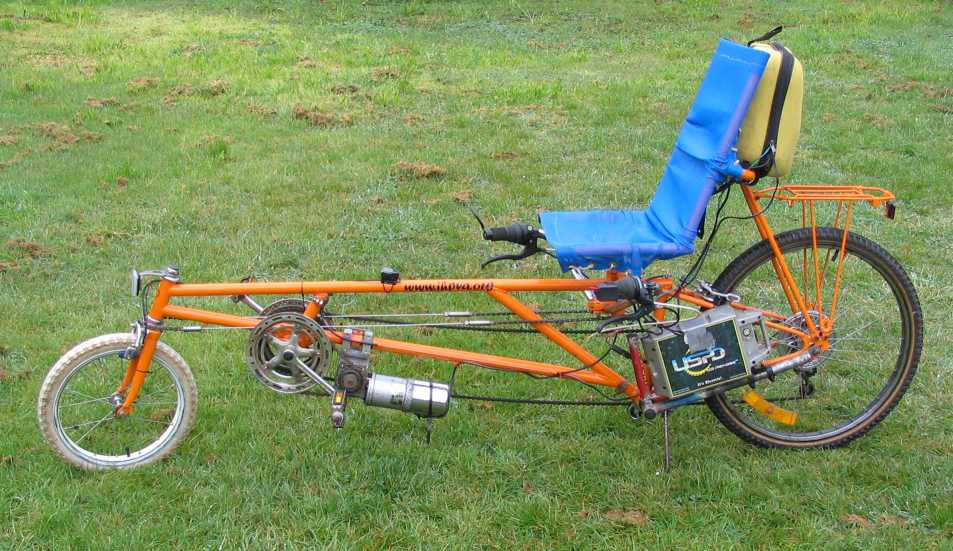
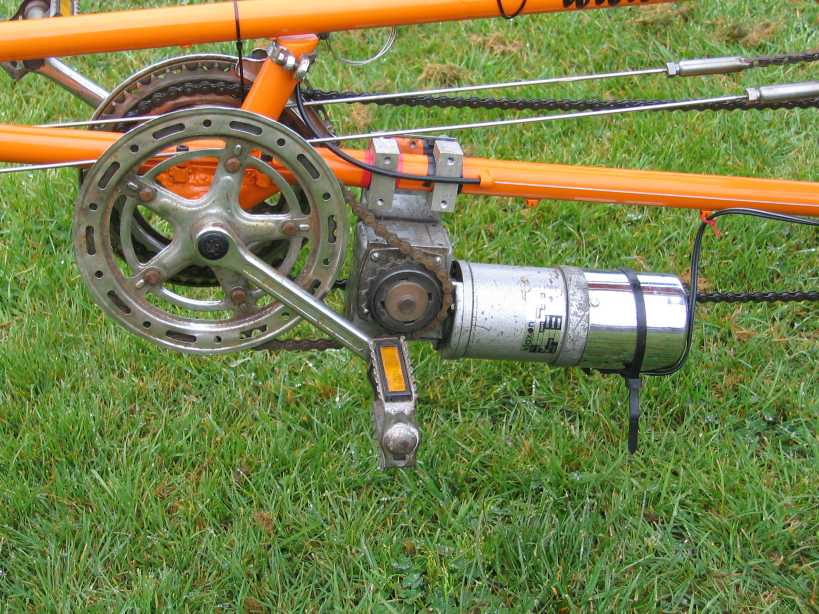
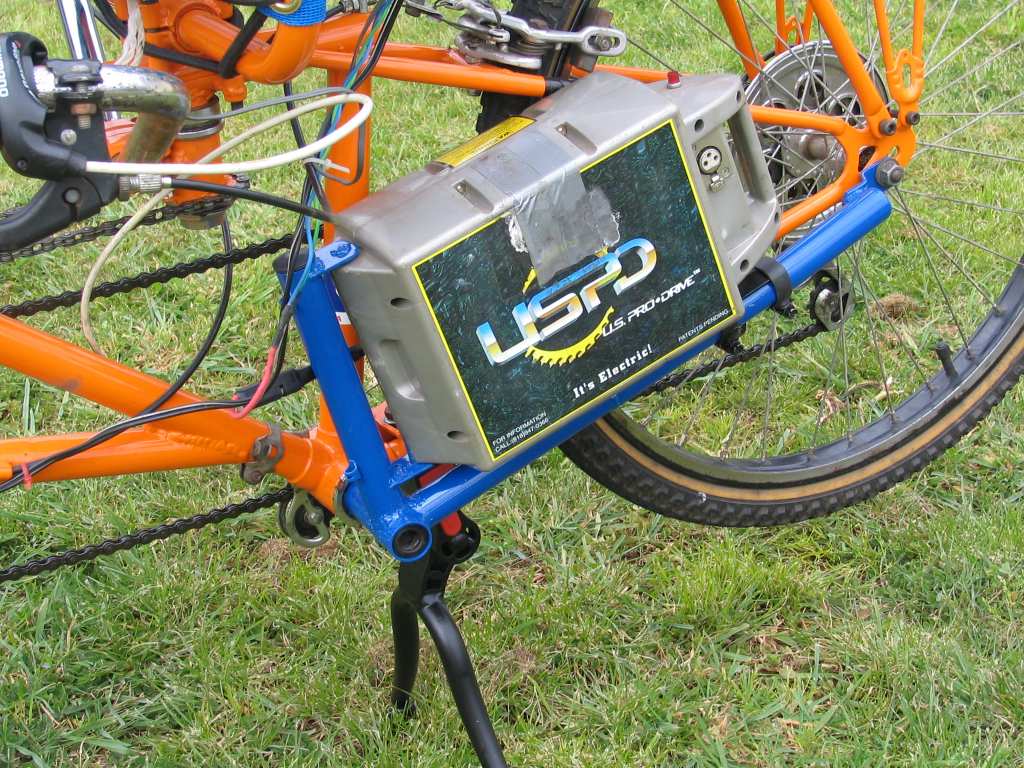
This may or may not stay but an electric motor assist was added. This drives the cranks allowing all the existing gears using an ex electric wheel chair motor/gearbox. A ratchet is placed on the gearbox drive shaft so the rider can pedal without the motor on but the rider has to pedal if the motor is driving. The motor is mounted as low as possible to minimise the top heavieness I found on earlier. I was concerned that there was too much start up force as the motor has just an on/off switch so incorporated a soft start circuit to the design. The battery pack is 2 x 12AH gel batteries as taken from a US Pro Drive kit with a custom mount bolted onto the old BB. Video (1meg) of motor running on bike. The motor draws about 2 amps when driving the whole bike drive train (see and an older video (1.2 meg) of it all running like this) so I figure this is the losses and about 10 amps when loaded down to about 1/2 revs. I conclude from this I have about the legal limit here in Australia which is a max of 200w.
See here for much more info on this sort of motor setup on a trike.
| Max Height | 1.85m |
| Max Length | 2.19m |
| Wheelbase | 1.73m |
| BB Height to centre of axle | 330mm |
| Rider Seat height | 620mm |
| Trail | 80mm |
| Front wheel | 16" |
| Rear wheel | 24" |
[ Home ] [ Ally] [Stamp FAQ] [ HPV Index ] [ Design overview ] [ Bike 1] [ Bike 2] [ LWB Bike] [ SWB Trike ] [Electrified 20" Tadpole trike] [ Childs Trike ] [ SWB Trike 2 ] [ Electric Trike ] [ RWS Trike ] [Delta Trike] [Childs Hi-Wheeler] [ Bike Trailer ] [Recumbent bike trailer] [Power Trailer] [ Steering Diags ] [ Steering Mounting] [ Kingpin Diags ] [Novel HPV Ideas] [ Australian HPV Resource ] [ Links ] [Power Assist] [ Unusual Vehicles ] [ Electric RC Models ] [ EV Circuit Diags ] [Tas HPV] [QLD PP] [Qld HPV] [Skycycle] [Bleriot] [Building HPV's] [Darryl] [Null Modem] [ Pedalezy ] [ USPD ] [Zeta] [Power Attachment] [Email]