| Bill Volk's
Coroplast
(TM) Craziness Page!
Running Fast without Excessive Mass
I FEEL THE NEED!
THE NEED FOR SPEED!
|
|
|
What is this Coroplast(TM) stuff in the first place?
|
 |
|
What's so great about it? Coroplast is strong and light due to its structure. The material has "ribs"
that separate two layers of plastic. These ribs are the secret to the durability
and toughness of Coroplast. Just as a hollow tube can be stronger than a
smaller, but heavier solid rod ... Coroplast's "hollow" nature makes
it tougher than heavier solid fiberglass or plastic structures. It also allows
you to create self-supporting structures that do not require a frame, unlike
Lexan (of course Lexan is transparent). |
|
|
|
The best thing about Coroplast is it's cheapness and ease of building neat
one-off light and durable structures. No molds, no metal work, and you wind
up (hopefully) with a lightweight affordable fairing that can take abuse.
You can curve it with relative ease, and it's low cost allows for a trial
and error approach to design.
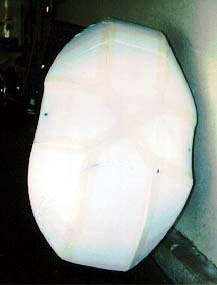
I didn't intend to even use this first effort. But it turns out to have been
a pretty decent faring. It's large, but so am I. I don't have a problem seeing
over it, but if I did ... a few minutes with a knife would solve the problem.
|
| How do you work with it? I prefer to use a heat gun, though my first effort (front fairing #1, see below) used a heat shrink iron.
WARNING: These tools get HOT!
|
|
|
|
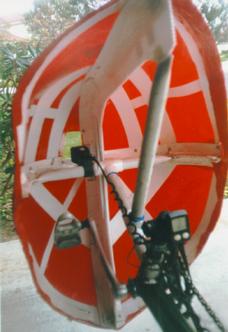
Note the key to this entire structure's integrity is the small cross piece
running across the width of the fairing. This cross piece acts as a tensioned
member resisting the forces (from the apparent wind) that tend to bend the
fairing. The result is a fairing that holds it's shape even at 45 mph. Which
is as fast as I care to go .... thank you. WARNING! Fairings may make you go faster. Your bike should be setup for the speed you will ride it at. Cheap tires are not a good idea at higher speeds. Check your tires, wheels, and frame often. Also make sure your fairing mount is strong and durable. Your mileage may vary..... Proceed at your own risk. |
| This fairing consisted of a cross of four curved Coroplast sections.
Four additional sections were fitted in. Sections were joined with fiberglass
strapping tape. The second fairing used a technique I call
"Coroplast/monokote(TM) welding." This uses 1/4 oz./sq. ft. heat shrink plastic
that is melted onto the Coroplast with the heat shrink iron. Very strong,
very light, and nicer looking. |
|
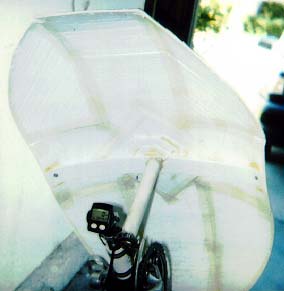
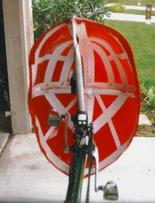
| If at first you don't succeed, Fairing #2!
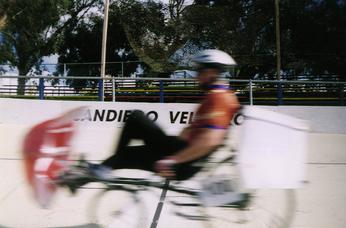
Yes, here is a picture of my bike with the front fairing I raced the '96 WHPVC with. This fairing uses 16 sections of Coroplast to create a "zeppelin-like" shape. Seams were joined with Topflight Econokote(TM) heat shrink plastic strips. This stuff is used in model aircraft coverings. The tricky part is making it work on the concave inside seams. Fairing #2 is 25" in diameter, and 20" long. It weighs less per. square inch than the old one .... since it uses the lighter Econokote construction technique. Bottom line, it's faster as well. |
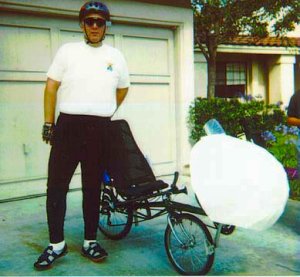 |
| The windshield is cut from the same sort of plastic used for windshields in model aircraft. Bonded to the fairing with the Econokote as well. It maintains it's shape to 30 mph and then begins to deflect. The fairing shows no deflection at 40+ mph (heck it took 90 mph on top of a car to blow off the windsheld!). Since the sections are "pulled" together by the action of the Econokote, it is rattle free. Same mounting system as the first fairing. Why not build several for different occasions? (Note how the bulbous shape of the fairing can make anyone look thinner.) | |
|
|
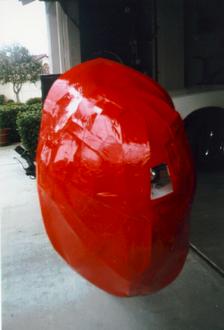
Presenting:
Faring #4, The Ultra Light
Hey, don't even ask about Faring #3. |
Here's another view of the Ultra Light. Note the NightRider(tm) light mounted inside the fairing.This fairing uses a frame made up of PVC and coroplast ... covered with Monokote. Carefull construction could build a fairing that weighed less than one pound. Heck the PVC weighed 12 oz. all by itself! Try carbon fiber kite poles and get really light! |
|
|
|
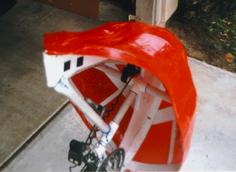
You want more detail, Here's more detail!
See how this fairing is built with two main coroplast frames .... three would have produced a more symmetrical shape. The framing uses the 4mm coroplast attached to 2mm coroplast strips curbed to fit the cut shape. "Battens" are composed of 2mm coroplast. Coroplast is joined with double sided foam tape and rivets. This fairing holds up to occasional kicks and bumps .... but I don't recommend "car topping" with the fairing attached (it worked at 70 mph but looked terrible). PVC is flattened on the ends and bolted to the coroplast frame with nylon nuts and washers. |
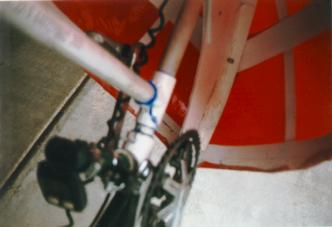
| The Mount
The mounting simply is a T-section of PVC attached to the derailler post with two pipe clamps. The fairing's pvc frame just slides in and is secured by a "pin" of steel wire. Comes apart in seconds. |
 |
|
|
See what I mean by the need for a third frame? The heat shrink plastic tends to distort the structure. Another frame running around the edge would have prevented this. |
| Isn't that a pretty bike? |
|
|
|
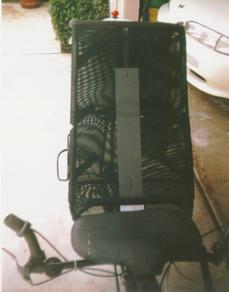
What does this have to do with fairings?
Nothing. But if you look closely you'll see a small vertical strip of coroplast attached to the back of the WONDERFUL Rans seat (attached to my S&B). That acts like a rear fender. |
| See how I cleverly mounted a ESGE double kickstand on the "sub frame" of my bike? Machined a block of derlin plastic with a drill press and a Dremel Motor Tool (tm.). Totally eliminating any weight savings with the new front faring, but still ... a lot more fun than leaning the bike against stuff. |  |
|
|
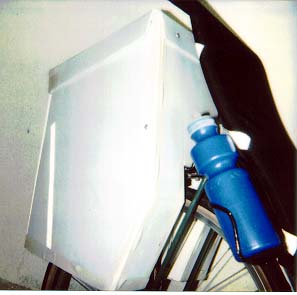
And now for the ... ever useful tailbox.
Four front farings later ... and still the same tailbox
|
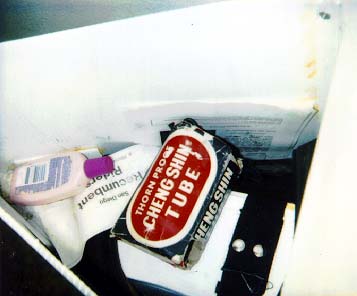
| That's two spare tubes, a Moulton 17" front tire spare (call me paranoid,
but I know the Moulton will decide to go bye-bye miles away from any source
of these excellent tires), sunscreen, tool-kit, first-aid kit, ride notices,
spare zip ties, spare shifting cable, and a printout of the "Recumbent FAQ."
Lots of spare room for clothes, food, and any small household pets. |
 |
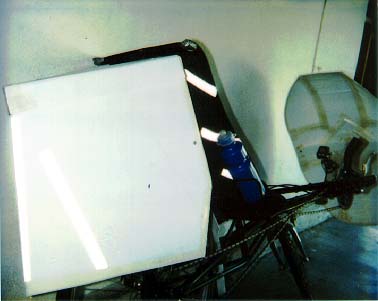 |
The construction uses contact cement (DAP Weldwood) and aluminum pop rivets.
"Angle Pieces" of Coroplast are first bonded and then riveted. You can see
one right next to the pink sunscreen bottle. Cloth straps attach the tailbox
to the existing rear rack. A self supporting tailbox is a real possibility.
Using double sided foam tape instead of contact cement is probably o.k.,
and it's easier to work with. ALWAYS re-enforce with rivets or nuts and
bolts. The tailbox narrows in a V-like shape that actually improves the aerodynamics of the bike. I also mount 3M reflective tape for better visibility. I expect to mount flashing LED's along the rear edge as well .... by attaching externally mounted LED's to an existing Vistalite(TM). |
|
Comments, Suggestions, and Abuse? Email: bvolk@inetworld.net |
|